Pacman: Play another classic game on your phone
Create a Pacman Game with JavaScript in WebViewer
In this tutorial, we’ll create the classic game Pacman. As with Tetris, we consulted Google Gemini 3 Pro to build the core game in JavaScript running inside a WebViewer. App Inventor controls this JavaScript.
Since the complex game logic is handled by AI-generated JavaScript, the App Inventor setup remains very simple.
You can download the source code (aia file) and the HTML file with JavaScript from the download section at the bottom of the page.
What You Will Learn in This Tutorial
- Running JavaScript in a WebViewer
- Passing data between the app and the WebViewer
Components Used
Button, Label, WebViewer, HorizontalArrangement, TableArrangement, Sound
Blocks Used
No special blocks are required.
Designer
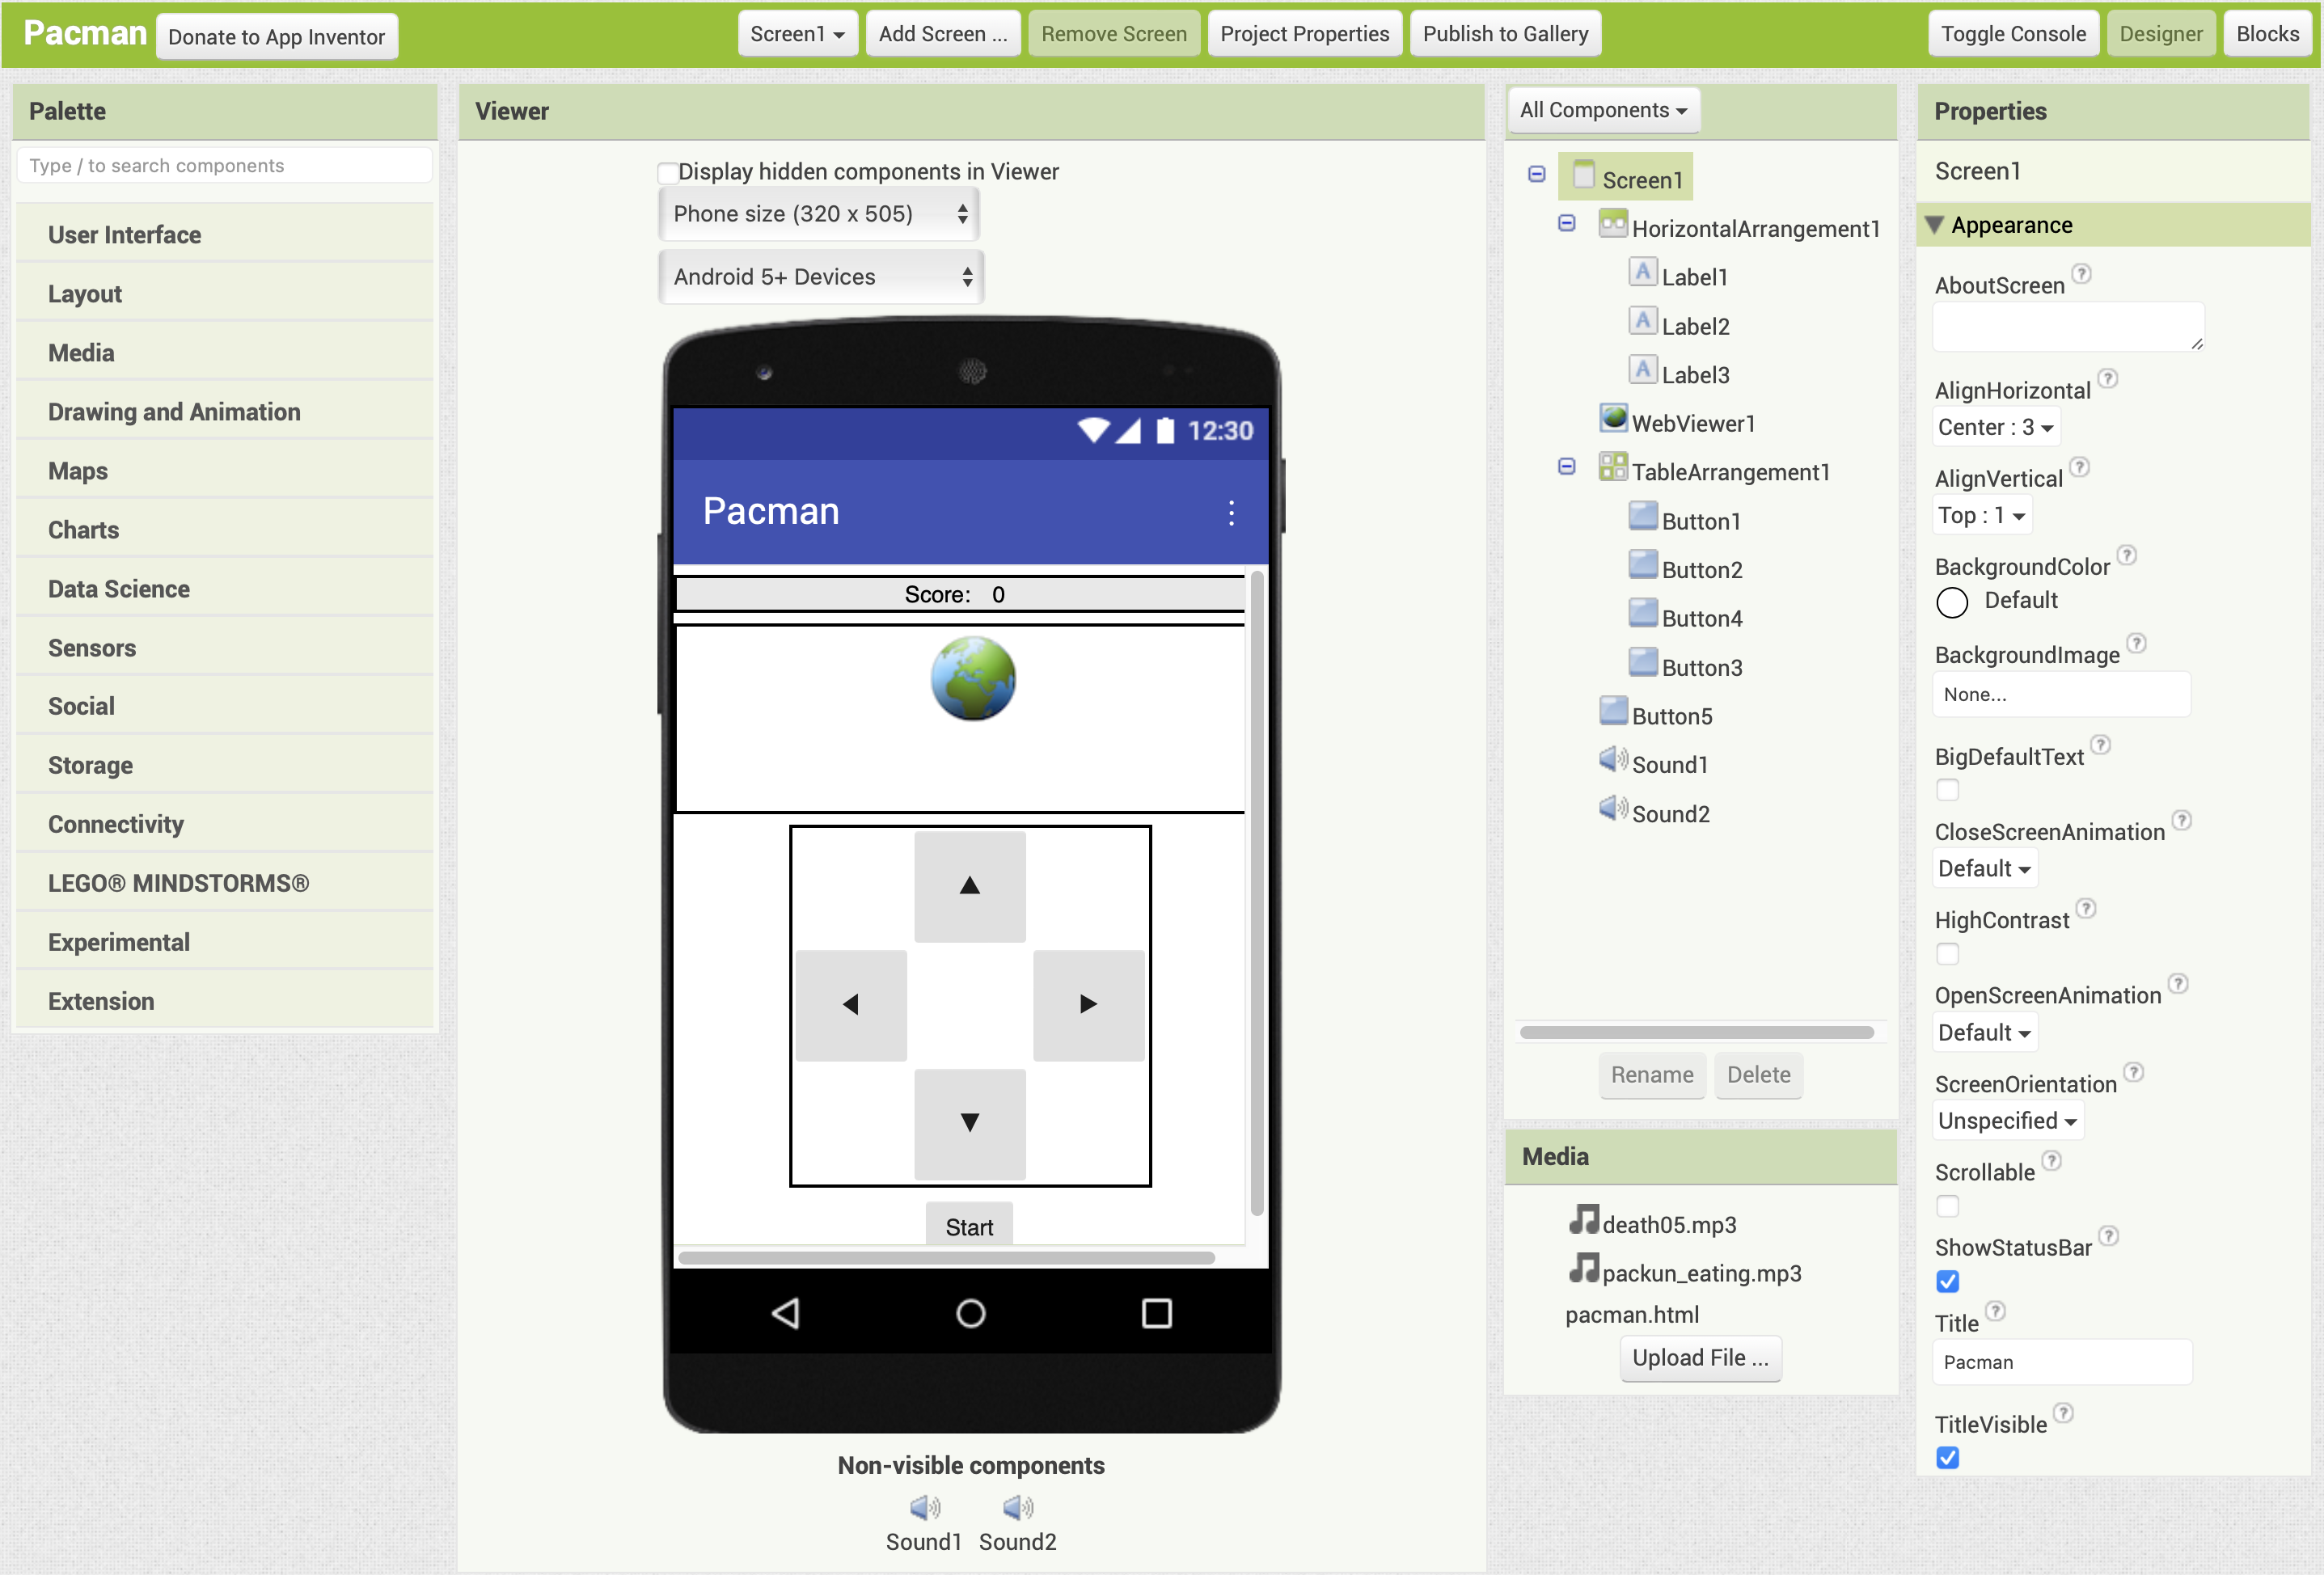
Set the title of Screen1 to “Pacman". Set the AlignHorizontal property to "Center".
Download the files pacman.html, packun_eating.mp3 and death05.mp3 from the download section at the bottom of this page, and then upload both files to the Media section using the Upload File button.
From the Layout palette, add one HorizontalArrangement components to the Viewer. The components will be named HorizontalArrangement1. Set the AlignHorizontal property to "Center" and the Width to "Fill parent".
From the User Interface palette, add three Label components to the HorizontalArrangement1. The components will be named Label1, Label2, and Label3, respectively.
From the User Interface palette, add a WebViewer below HorizontalArrangement1. Set the Width to "Fill parent". The component will be named WebViewer1.
From the Layout palette, add one TableArrangement components below the WebViewer1. The components will be named TableArrangement1. Set the Columns property and Rows property to "3". Add one button each from the User Interface palette to row 1 column 2, row 2 column 2, row 2 column 3, and row 3 column 2 in TableArrangement1. The components will be named Button1, Button2, Button3, and Button4, respectively.
From the User Interface palette, add one Button components below the TableArrangement1. The components will be named Button5.
Set the properties as follows:
- Label1: Text=Score:
- Label2: Text=0
- Label3: Text=(leave blank)
- Button1: Height=60 pixels, Width=60 pixels, Text=▲
- Button2: Height=60 pixels, Width=60 pixels, Text=◀
- Button3: Height=60 pixels, Width=60 pixels, Text=▶
- Button4: Height=60 pixels, Width=60 pixels, Text=▶
- Button5: Text=Start
Finally, From the Media palette, add two Sound components to the Viewer. The components will be named Sound1 and Sound2. Set Source property to the packun_eating.mp3 and death05.mp3, respectively.
At this point, the Designer screen should appear as shown below.